


How to Create Course Lesson Video Summaries
- Posted in:
- Artificial intelligence
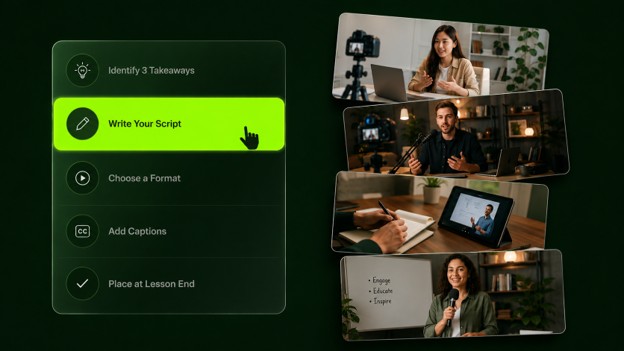
Most online course creators focus on recording great lessons. They spend far less time thinking about what happens after the video ends. That gap is where learners lose context, and where lesson video summaries come in.
A lesson video summary is a short recap of the key points from a single lesson. It reinforces what students just watched and gives them a clear mental anchor. Research published in Nature.com shows that short, focused videos significantly improve student performance in online courses.
Done right, summaries take under two minutes to watch and around 30 minutes to produce. Here's a repeatable process to create them at scale.
Step 1: Identify the three core takeaways
Before opening any recording tool, go back to the lesson. Ask yourself: what are the three things a student must remember?
Write them as short, plain statements. Avoid restating every detail. A summary is selective by design. The goal is clarity, not completeness.
Three takeaways is the right number. More than that, and you're re-teaching instead of reinforcing.
Step 2: Write a script before you record
A summary script should take between 60 and 120 seconds to read aloud. Write it word-for-word before recording anything.
Mirror the language you used in the lesson. Familiar phrasing helps learners recognize what they're being reminded of. Short, direct sentences work best.
Read the script aloud once before you hit record. If it runs past 90 seconds, cut it. Anything beyond two minutes becomes another lesson, not a recap.
Step 3: Choose your format
Three formats work well for course lesson video summaries.
- Talking head: You on camera, walking through the three key points. Best if you were already on camera in the main lesson. Works well for courses built around personal expertise or coaching.
- Screen recording with voiceover: Share your slides or a visual outline while you narrate. Fast to produce and easy to template across lessons. Works especially well for technical, process-heavy, or step-by-step content.
- Text-based or animated video: Motion graphics or text overlays present each point visually and cleanly. A practical option for solo creators without a production team is VEED's AI video generator, which turns a written script into a polished video in minutes.
Pick the format that fits your workflow and stick with it. Consistency across lessons matters more than production quality.
Step 4: Add visual reinforcement
Every summary needs visual anchors, not just audio. Visuals help learners connect what they're hearing to what they just watched.
- Talking head: Use text overlays or lower thirds to show each key point on screen as you say it.
- Screen recording: Use highlights or callouts on the most important elements.
- Text-based video: Keep to one point per screen with large, easy-to-read text.
Combining audio narration with on-screen visuals significantly improves knowledge retention compared to audio alone. That's the whole point of the format.
Step 5: Keep the length under two minutes
If your summary runs past two minutes, it's too long. Students need a recap, not a replay.
Go back to your three takeaways and trim. Remove any example or walkthrough that belongs in the main lesson, not the summary. A tight 90-second recap is more effective than a loose three-minute one.
Short summaries are also easier to batch-produce. Once you have a working template, you can record three or four in a single session.
Step 6: Review and correct your captions
Students watch videos in coffee shops, on transit, and on muted screens. Captions aren't optional.
Most platforms auto-generate captions, but they make errors, especially with technical terms or proper nouns. Always review them before publishing. One mislabeled term in a key point leaves a learner with the wrong idea.
Accurate captions also make your course usable for deaf and hard-of-hearing learners. It's a small task with an outsized impact.
Step 7: Place the summary at the end, then point forward
Position video summaries as the final element in each lesson, after all the main content. Students who've just finished the lesson are primed to absorb the recap.
End every summary with one forward-looking line. Something like: "In the next lesson, we'll cover X." It tells learners what's coming and gives them a reason to keep going.
This one habit reduces drop-off between lessons consistently over time.
Step 8: Repurpose summaries beyond the course
A two-minute recap video has value well outside your course platform. It's exactly the right length for LinkedIn, YouTube Shorts, or Instagram Reels.
Sharing summaries as preview content also helps with marketing. Prospective students see the depth and quality of your lessons before buying. You're showing value without giving the full course away.
One well-made summary can work in three or four places at once.
Conclusion
Course lesson video summaries are one of the most effective upgrades you can make to an online course. They improve retention, reduce drop-off, and generate ready-made content you can repurpose.
Start with three takeaways per lesson. Write a short script, pick a consistent format, and build summaries into your production workflow. The first one takes the most effort, but every one after that gets faster. Make it a habit now, and it pays off with every course you