


How to Turn a 150-Word Script into a Short Video with AI
- Posted in:
- Software
A 150-word script looks short on the page, but it can carry a complete idea. At a natural speaking pace, it usually becomes roughly a one-minute narration. That is enough room to introduce a problem, make one useful point, and finish with a clear takeaway.
The difficulty is visualizing it. A paragraph is written to be read in sequence, while a short video needs concrete subjects, visible actions, deliberate framing, and a pace the viewer can follow. Copying the full script into a generator without planning those elements often produces a clip that feels busy or disconnected.
A more reliable approach is to treat the script as the source material, not as one oversized prompt. Break it into visual beats, choose one beat for each generated clip, and give the model directions a camera could actually capture. An AI video generator such as insMind can then create the raw visual material while you retain control over the message, narration, captions, and final arrangement.
Why 150 Words Is a Useful Starting Point
Short-form video benefits from a narrow idea. With about 150 words, there is less temptation to overload the viewer with background information, competing examples, or several calls to action. The limit forces the writer to decide what matters.
Word count and video duration are related, but they are not interchangeable. At 130 to 160 spoken words per minute, a 150-word voiceover may run for about 56 to 69 seconds. Pauses, emphasis, product names, and on-screen demonstrations can make it longer. Read the script aloud with a timer before producing visuals.
Quick estimate: 150 words / 150 words per minute = about 60 seconds of narration.
If the target is a 30-second video, reduce the narration rather than asking the speaker to rush. If the script must remain intact, plan several short scenes and assemble them under the voiceover. AI generators commonly produce brief clips, so a full 150-word story will usually require more than one generation.
Prepare the Script Before Opening the Generator
First, divide the script into four to six beats. A beat is one meaningful change in the visual story: a new action, a new detail, or a new result. Underline the nouns and verbs in each section. Those words often reveal what the viewer should see.
Suppose the script explains a simple morning writing routine. Its beats might be: a blank desk before sunrise, a writer listing three ideas, a distracting phone being turned face down, a paragraph taking shape, and a finished draft ready for review. Each beat is visually specific and can stand on its own.
Next, convert every beat into a shot instruction. Do not paste voiceover claims such as “this method makes you more productive” and expect the model to invent a precise picture. Describe evidence the camera can show: “a writer checks off the third item on a small paper list beside a completed laptop draft.”
How to Turn the Script into Video with insMind
The following four-step workflow uses insMind's current browser interface. It can be repeated for each visual beat in the script. Model availability, output duration, resolution, and credit use can vary by account, so rely on the options displayed in your workspace.
Step 1: Choose Text to Video and Enter the First Beat
Open the insMind video generator, choose Text to video in the input selector, and click the prompt box. Keep the full 150-word script beside the browser rather than pasting it all at once. Enter only the first visual beat you identified.
Write it as a shot instruction in this order: subject, action, setting, visual style, lighting, camera behavior, and constraints. For example: “A freelance writer sits at a clean wooden desk before sunrise and writes three content ideas on a small notepad, realistic home-office scene, cool early-morning light, gentle over-the-shoulder camera push, natural hand movement, no logos, no random text.”
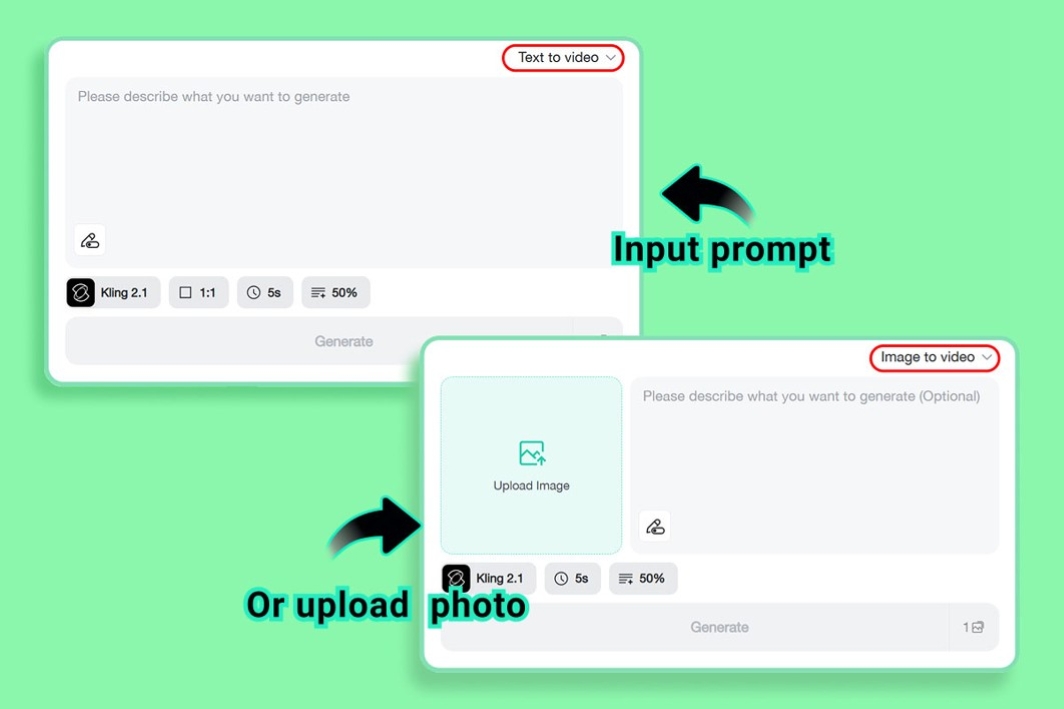
Step 2: Select Video Mode, Model, and Output Settings
Select Video in the creation workspace. Choose an available model, then review its frame or input options and output resolution. When aspect-ratio controls are offered, use 9:16 for vertical Reels, Shorts, and TikTok posts; 16:9 for widescreen presentations or YouTube; and 1:1 for square placements.
Make this decision before generating the first clip and retain it for the remaining beats. Mixing horizontal and vertical shots creates avoidable cropping problems. The same applies to style: if the first shot is realistic and softly lit, do not request a cartoon look halfway through unless the change is intentional.
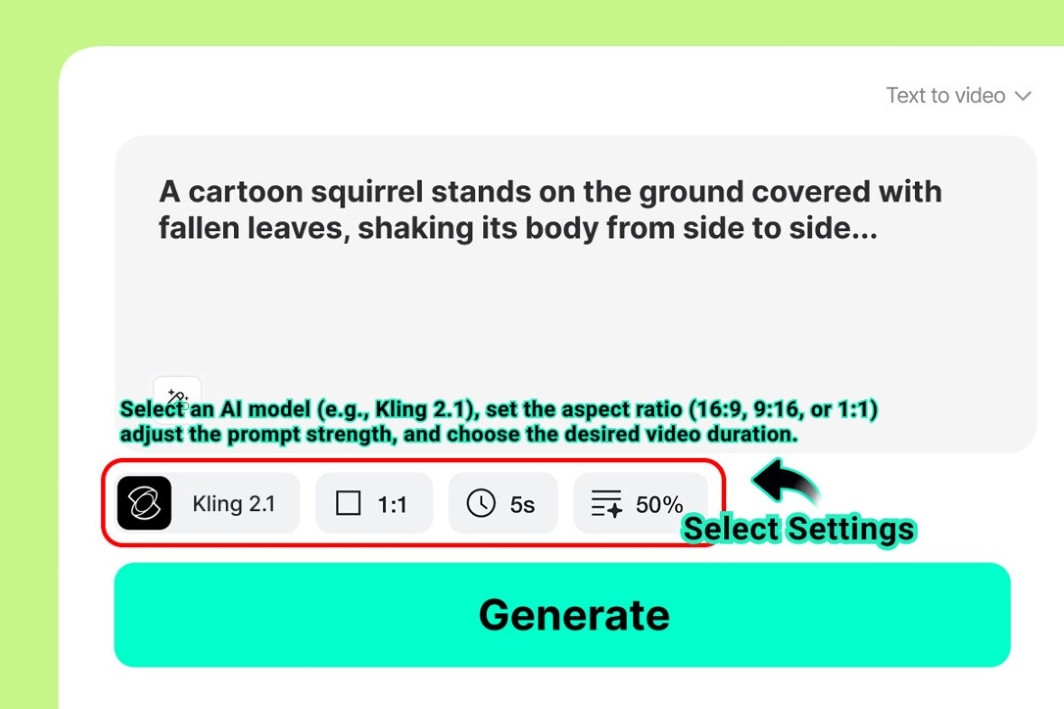
Step 3: Generate and Review the First Clip
Click Generate and wait for the first clip to render. Watch the entire preview rather than judging only its opening frame. Check whether the subject remains recognizable, the intended action is visible, the movement looks natural, and the framing leaves space for captions.
If the clip misses the main action, revise one instruction at a time. Replace a vague verb such as “works” with an observable action such as “writes three ideas on a notepad.” Keep each prompt centered on one action. If consistent characters or objects matter across several shots, repeat their defining details in every prompt and use supported reference-image features where appropriate.
The dedicated text-to-video tool follows the same practical principle: describe what should be visible, then choose the model and format that fit the destination. Avoid requesting long, exact on-screen sentences; generated lettering can be unreliable, and accurate captions are easier to add during final editing.
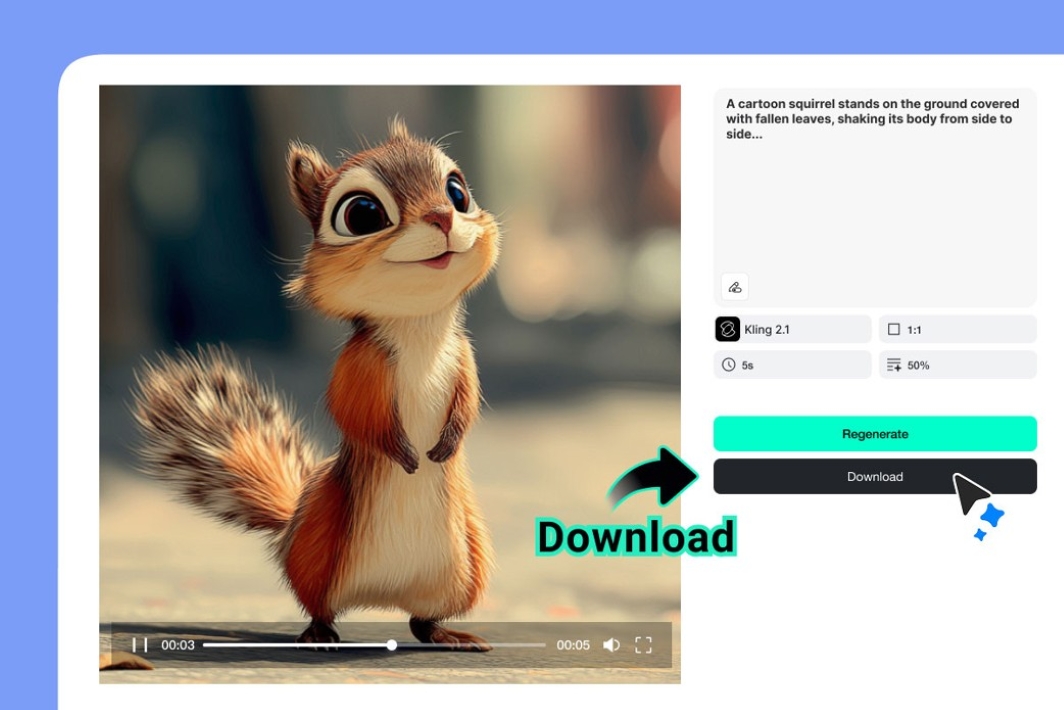
Step 4: Download the Clip and Repeat for Each Beat
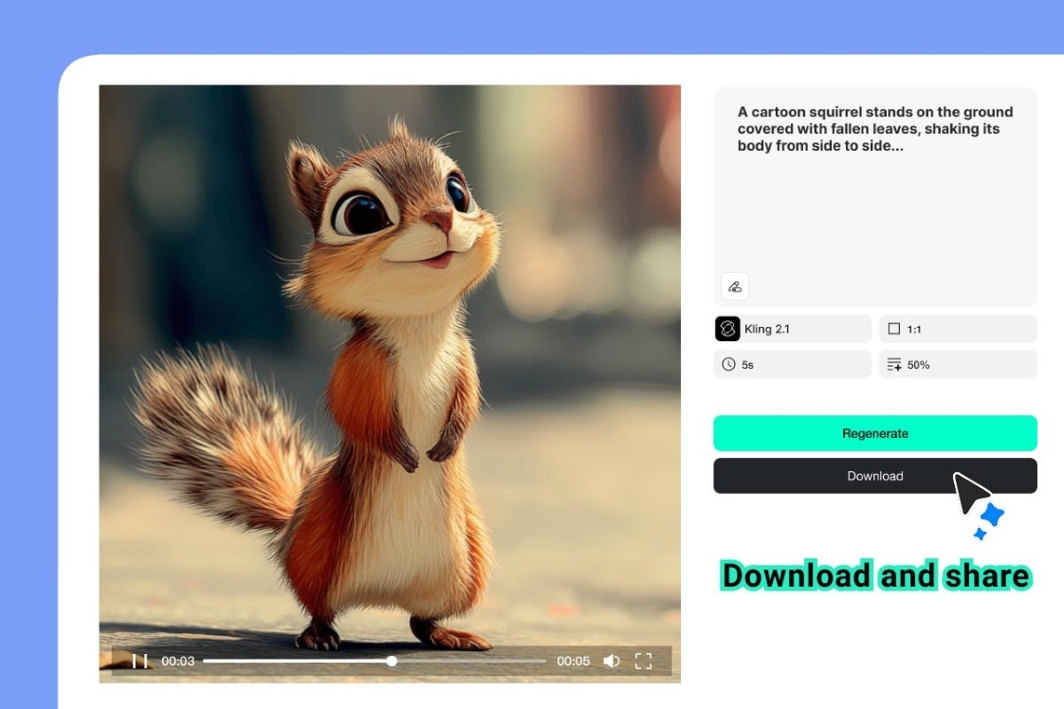
When the preview is usable, click Download to save the clip. Play the downloaded file once to confirm that it exported correctly, then label it by beat number. Repeat Steps 1 through 4 for the remaining sections of the 150-word script.
Arrange the clips in a video editor, record or import the narration, and add reviewed captions. Trim the visuals to the spoken rhythm rather than forcing every generated clip to play at full length. Add exact brand names and other critical text during editing, where spelling and placement can be controlled.
A Simple Prompt Formula for Every Beat
Use a repeatable prompt structure to keep the workflow fast:
[Subject] performs [one visible action] in [setting], [style and lighting], [camera framing or movement], [important constraints].
The formula is a checklist, not a requirement to make every prompt long. Include only details that affect the image. Words such as “successful,” “innovative,” or “high quality” communicate a marketing judgment but provide little visual direction. Replace them with observable details.
Weak instruction | More useful visual direction |
A productive writer | A writer completes a checklist beside a finished draft on a laptop |
An exciting product launch | A small team opens a package as colorful studio lights switch on |
A relaxing morning | Steam rises from a ceramic cup beside an open notebook in soft window light |
How to Keep Several AI Clips Consistent
A short video feels coherent when its shots appear to belong to the same world. Before generating, write a brief continuity note containing the subject's appearance, location, color palette, lighting, and visual style. Reuse those exact details in each relevant prompt.
- Keep one aspect ratio and a compatible resolution throughout the project.
- Repeat concrete identity details, such as clothing color and room design.
- Use similar camera language instead of jumping between unrelated styles.
- Generate connecting actions, such as reaching, turning, or opening, when one shot must lead into the next.
- Save prompts and settings alongside downloaded files for later revisions.
Perfect continuity is not guaranteed. Fine details can change between generations, especially when a scene contains hands, labels, screens, or several people. Use close review and strategic cuts. A cutaway to a notebook, product detail, or wide room view can hide a visual mismatch more naturally than trying to force every frame to match.
Common Mistakes to Avoid
Pasting All 150 Words as One Prompt
A narration may contain abstract claims, transitions, and several scenes. One prompt works best when it describes one bounded visual event. Segment the script before generation.
Confusing Narration with On-Screen Text
The voiceover can carry names, numbers, and detailed explanations. Let the generated visuals support that information, then add exact captions and labels in an editor where spelling can be verified.
Changing Format Midway
Choosing the publishing platform after generating several clips can result in aggressive cropping. Set the aspect ratio at the beginning and frame every subject for it.
Publishing the First Result Without Review
Watch at normal speed and inspect any claim-bearing frame. Look for visual artifacts, implausible motion, inaccurate products, and unlicensed or misleading elements. AI reduces production effort; it does not remove editorial responsibility.
Frequently Asked Questions
How long is a 150-word video script?
It is usually close to one minute when read at a conversational pace. The exact duration depends on pauses, emphasis, and the speaker's delivery. Record a timed read before fixing the visual edit.
Can insMind generate the entire one-minute video at once?
Available durations depend on the selected model and account options. For a multi-scene 150-word script, generating separate short clips for individual beats generally provides more control over pacing and visual revisions.
Should the prompt also be 150 words?
No. The script is for the audience; the prompt is an instruction for one shot. A concise prompt that names the subject, action, setting, style, camera behavior, and constraints is usually more useful than a long block containing unrelated narration.
What should be added after generation?
Most finished videos still need narration, accurate captions, timing adjustments, licensed audio, and any exact brand elements. These steps turn individual AI clips into a clear communication asset.
Final Thoughts
A 150-word limit is not a creative restriction. It is a practical framework for a focused short video. Time the script, divide it into visible beats, write one prompt per beat, and keep the settings consistent. insMind can speed up the creation of raw scenes, while the writer remains responsible for structure, accuracy, pacing, and the final message.